
Each client has their own profile page where you can see all their information, edit their details, and view their history with your business.
Editing a client
- 1
Open the client
Go to Clients, find the client you want to edit, and click their name.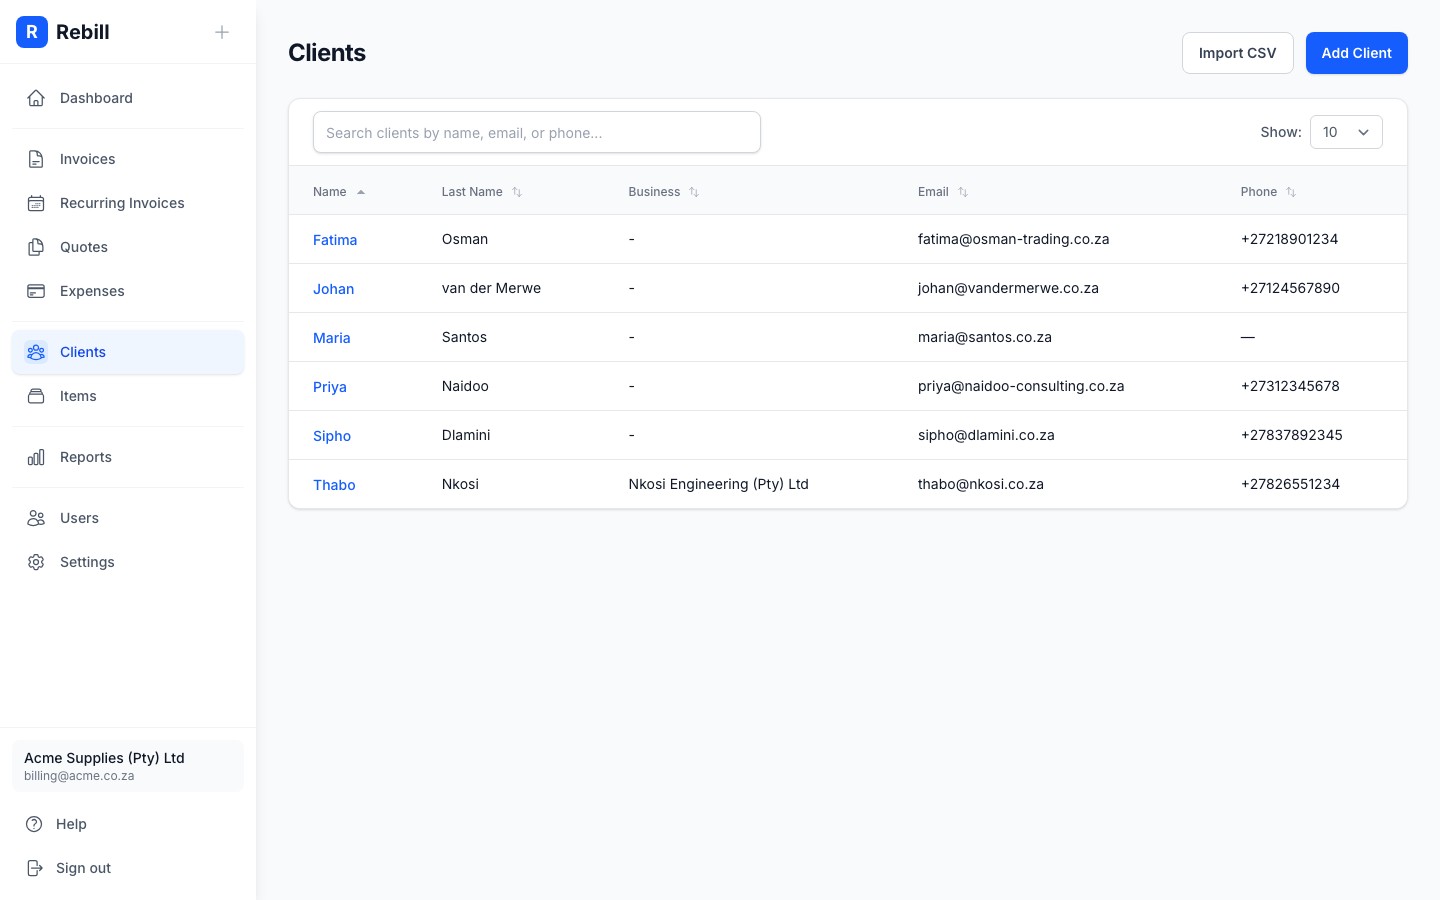
- 2
Click "Edit client"
Click "Edit client" at the top right to open the edit page.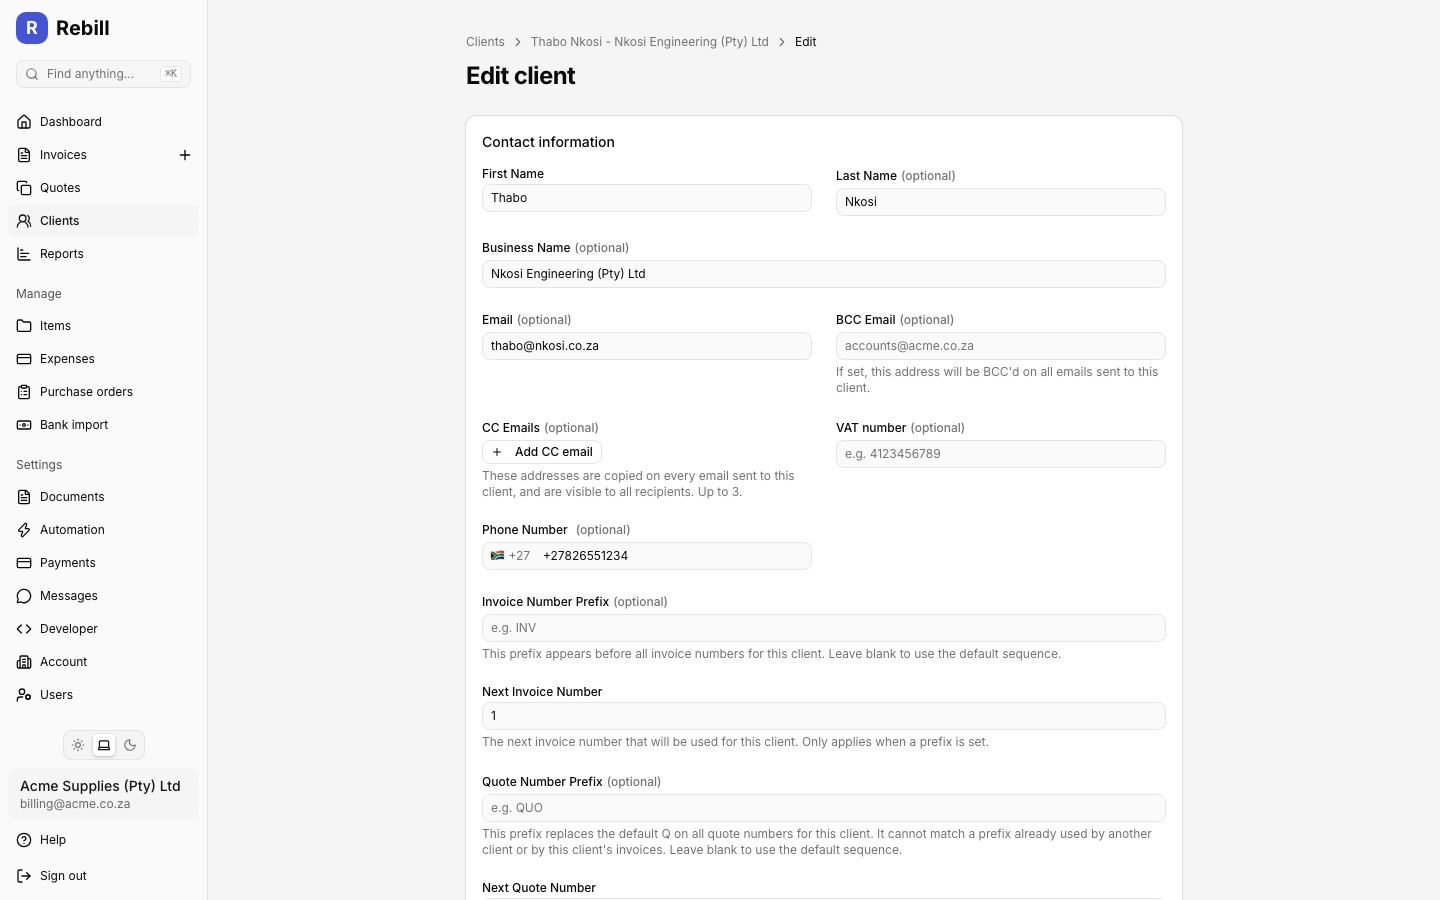
- 3
Make your changes and save
Update any fields you need to change, including Business Name if the client is a company. Then click "Save".
Business name on documents
When a business name is set, it appears as the primary name on invoices, quotes, and statements, with the contact person's name shown below it. This is useful when you deal with a specific person at a company but need the business name on official documents.CC, BCC, and VAT number
The edit client page also has three fields alongside the main email address:
- BCC Email Address: optional. If set, this address is BCC'd on every email sent to the client, hidden from the client.
- CC Email Addresses: optional, up to 3. These are copied on every email sent to the client, including invoices, quotes, statements, and reminders, and are visible to the client and any other CC recipients.
- VAT number: optional. Prints under the client's details on invoices and quotes.
Client code
Automatic codes. Under Settings, Documents, Numbering you can switch on "Assign client codes automatically". Every new client then gets the next code on save, in the form C0001, C0002 and so on, with a prefix you choose. Quick add from the invoice form and CSV rows without a code get one too. A code you type is kept as typed; if it matches a number in the sequence, that number is skipped.
Clients added before you switched it on have no code. Use Assign codes to existing clients on the same card to number them once, oldest first.
Custom fields
Adding a custom field
- 1
Scroll to Custom fields
On the client's detail page, scroll down to the Custom fields section.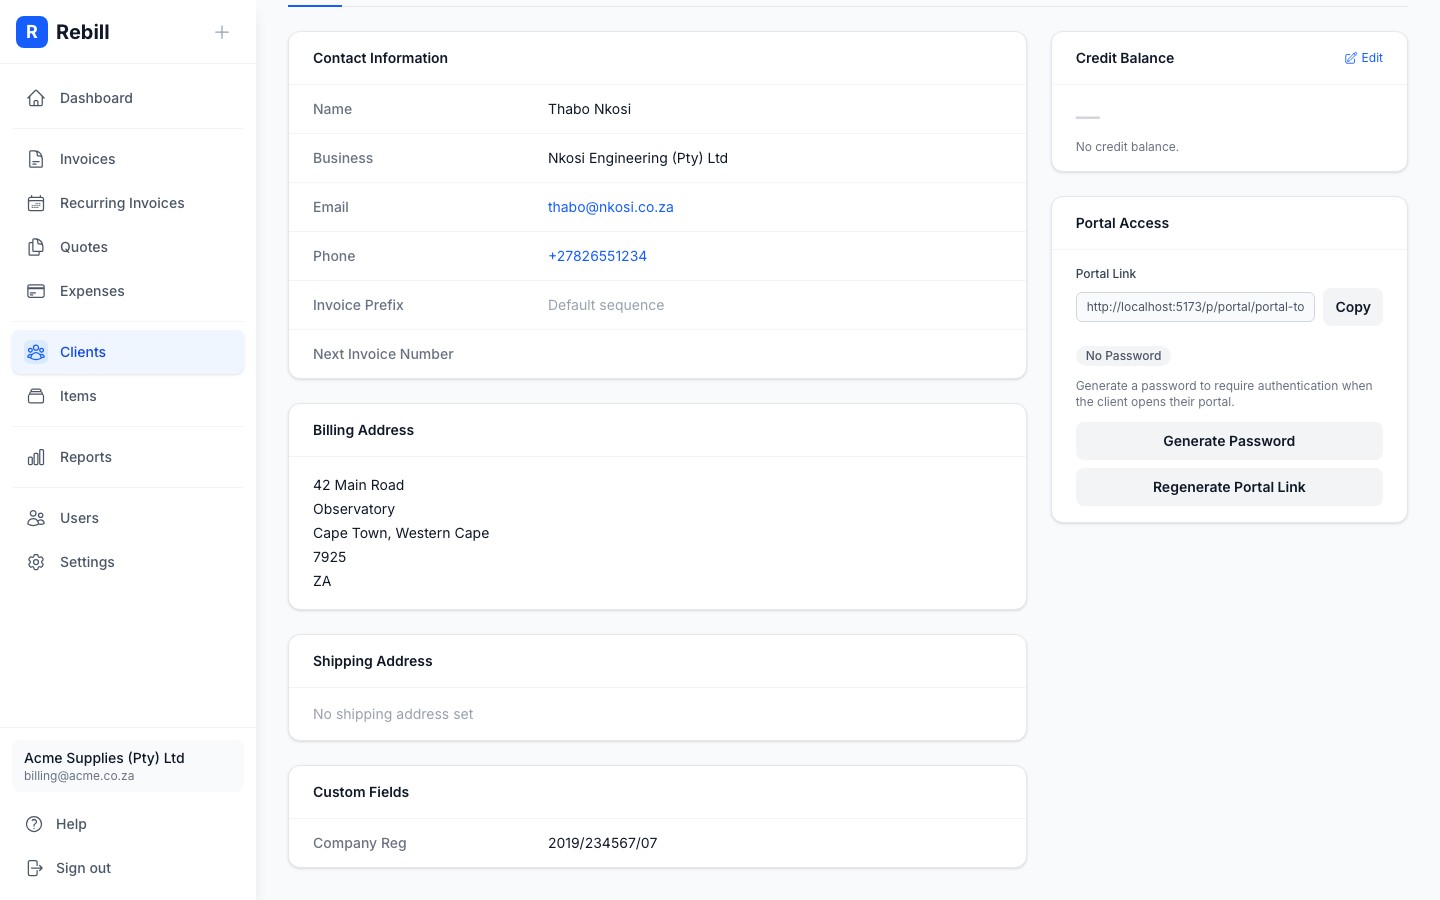
- 2
Add a field
Click "Add", enter a label (e.g. "Account Number") and a value, then save.
Credit balance
Adjusting a credit balance manually
- 1
Click "Add adjustment"
On the client's Details tab, find the Credit Balance card and click "Add adjustment".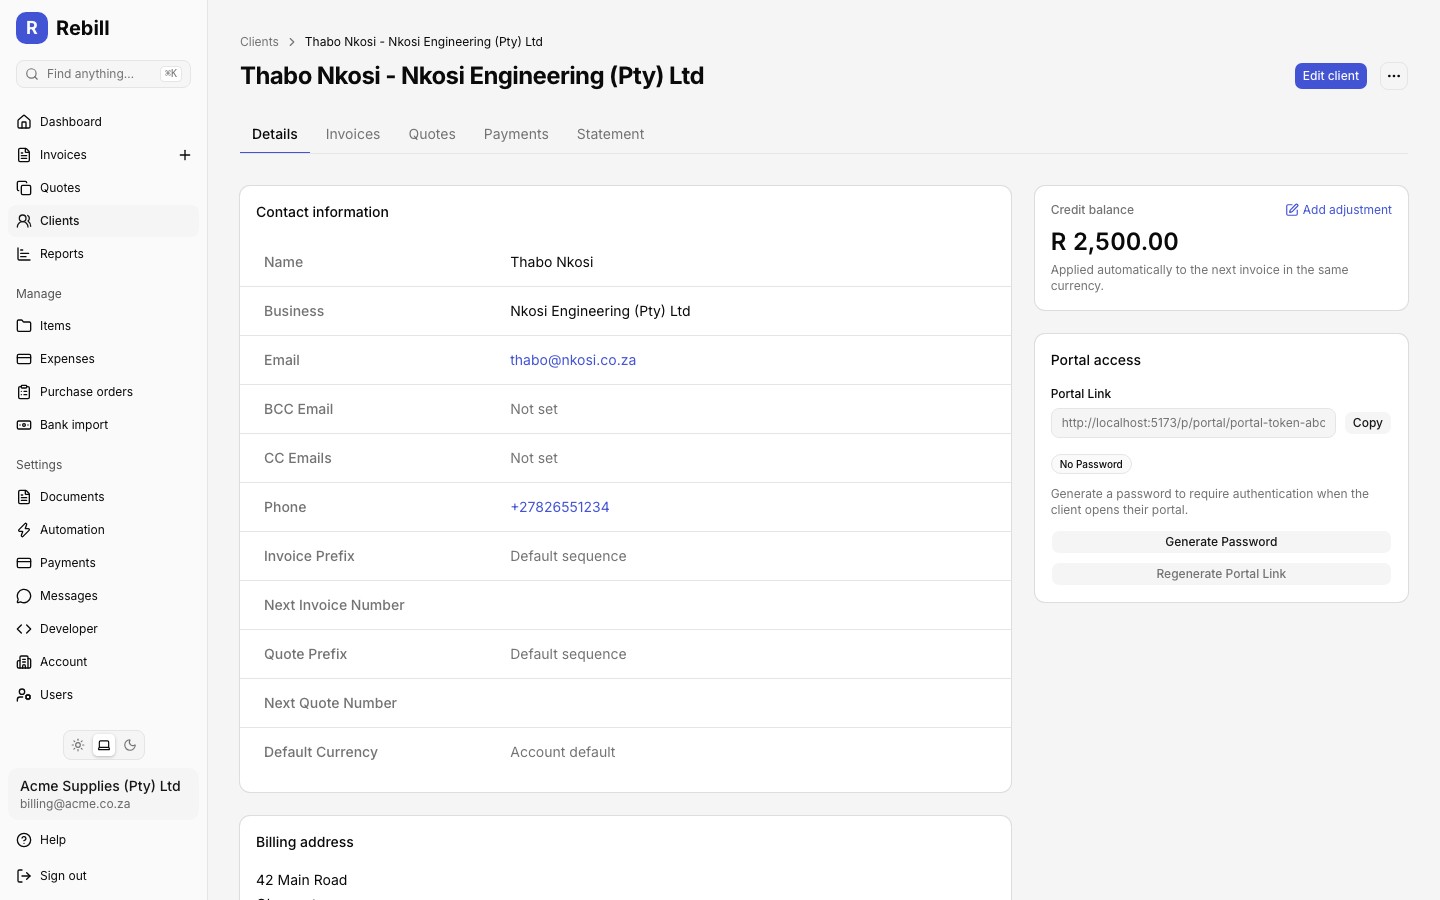
- 2
Enter the amount, reason, and date
Use a positive amount to add credit, or a negative amount to remove it. A reason is required (e.g. "Goodwill credit" or "Billing correction"). Click "Save Adjustment".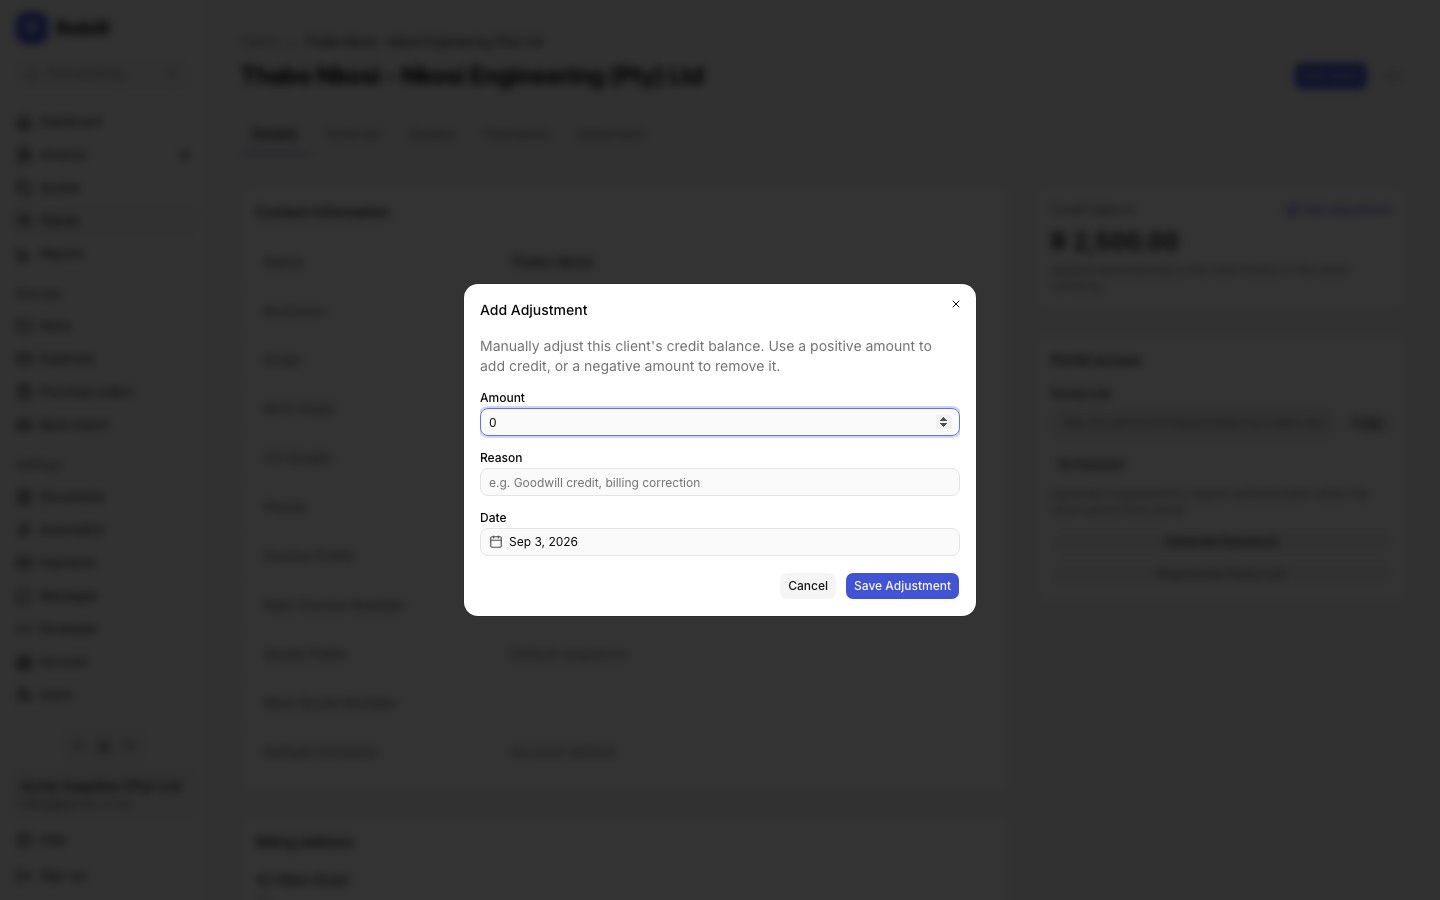
Note
Adjustments are also visible, alongside captured payments, in the client's payment ledger. See Client payments and the credit ledger.Default currency
Merging duplicate clients
- 1
Click "Merge Into..."
On the client you want to remove, go to the Details tab and click "Merge Into..." at the top right.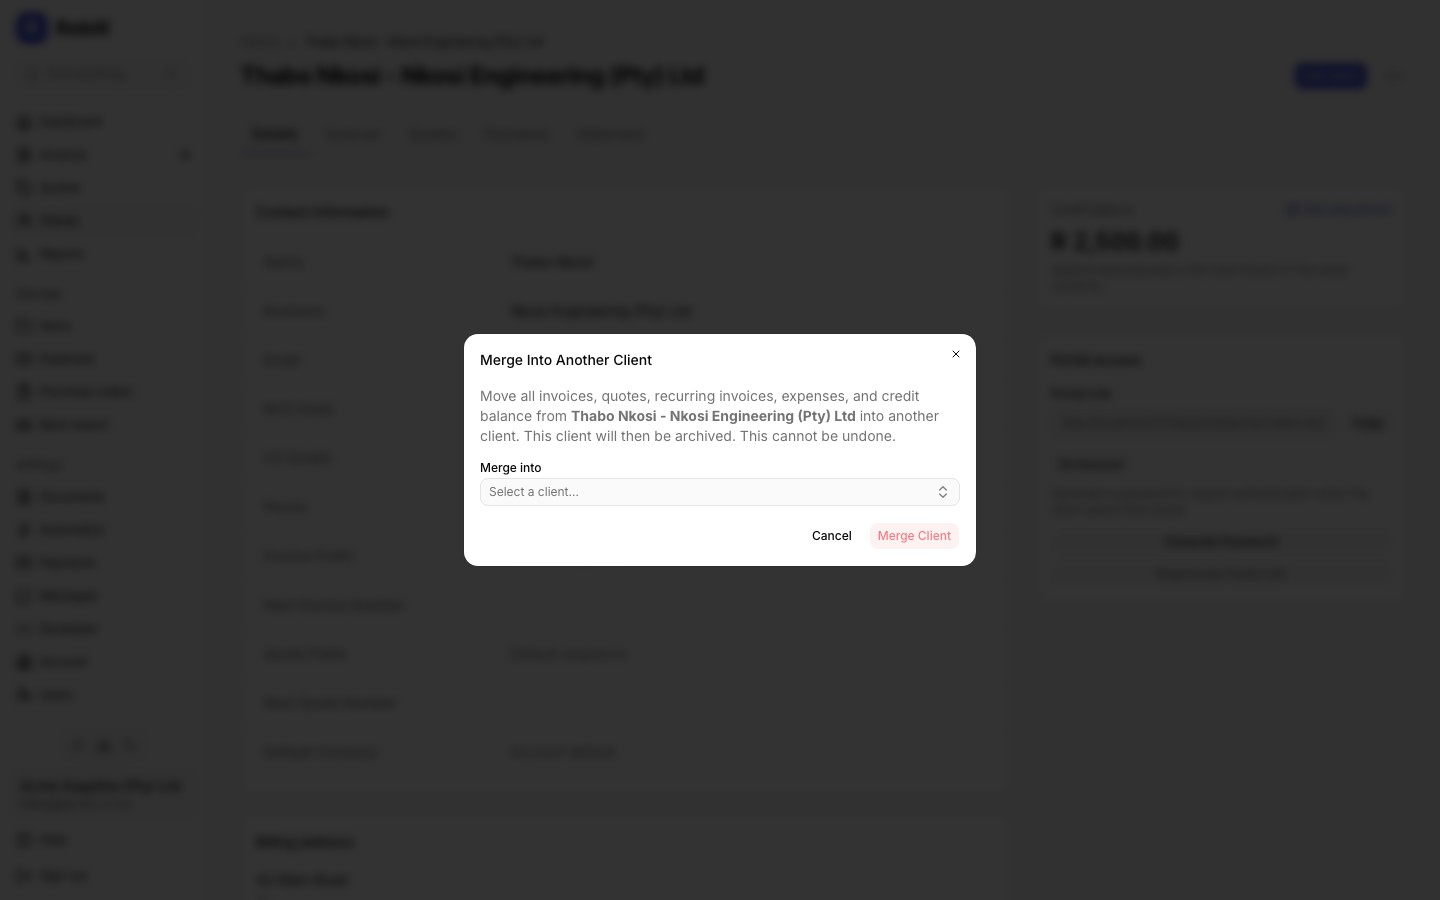
- 2
Choose the target client
Search for and select the client you want to merge into. Confirm by clicking "Merge Client".
What merging does
All of the source client's invoices, quotes, recurring invoices, expenses, and payment ledger (payments, allocations, and credit balance) are moved onto the target client. The source client is then archived. This action is permanent and cannot be undone.